Windows 10, by default, sends everything you explore for within the start Menu to their servers to supply you results from Bing search—so you better confirm that you just simply don’t type anything Very personal details into your own PC’s Start Menu. Or, you can just disable the Bing integration within the Start Menu.
Update: We tested this method in Windows 10’s 1909 version and it works.
It’s worth noting that Android and iOS also will send your search data to their servers to undertake and obtain more relevant results—but somehow it seems different when you’re on your pc in your house trying to look through your personal files.
We’re glad that they included a way to disable the web integration—it’s just worth noting that if you want to use Cortana, you don’t have any choice in whether the Start Menu use Bing, so you have to disable Cortana to disable the web integration.
You have to edit the Windows registry to disable web searches from the Start menu. Warning: The Registry Editor is a powerful tool and making the wrong change can make your system unstable or even dead. This is a straightforward change and, if you follow our instructions, you should be fine. But if you’ve never used it before, we always recommend to back up your Registry (also your computer) before start.
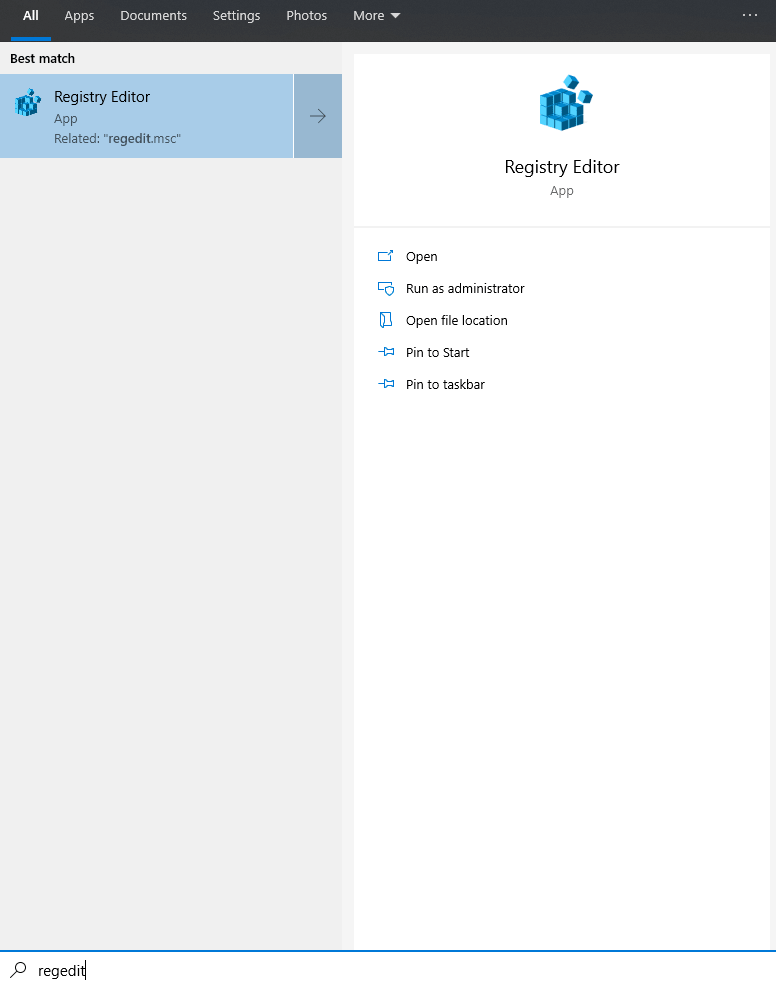
To open the Registry Editor by hitting Start and type “regedit”.
Double-click to the “Registry Editor” that appears (or press Enter) and click Yes if UAC prompt.

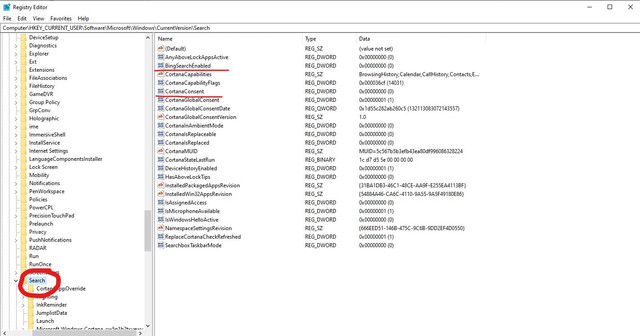
In the Registry Editor go to:
HKEY_CURRENT_USER\SOFTWARE\Microsoft\Windows\CurrentVersion\Search

Right click on the Search and choose New > DWORD (32-bit) Value. Name the new value “BingSearchEnabled”.
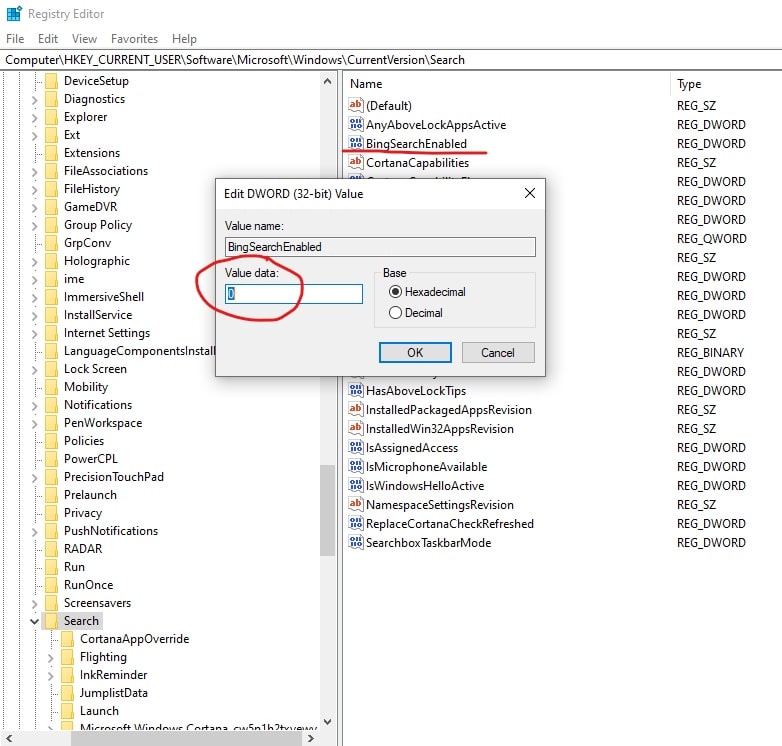
Double click on “BingSearchEnabled” and make sure the number on the “Value data” box should be 0 — just ensure it’s still 0. Click OK to continue.

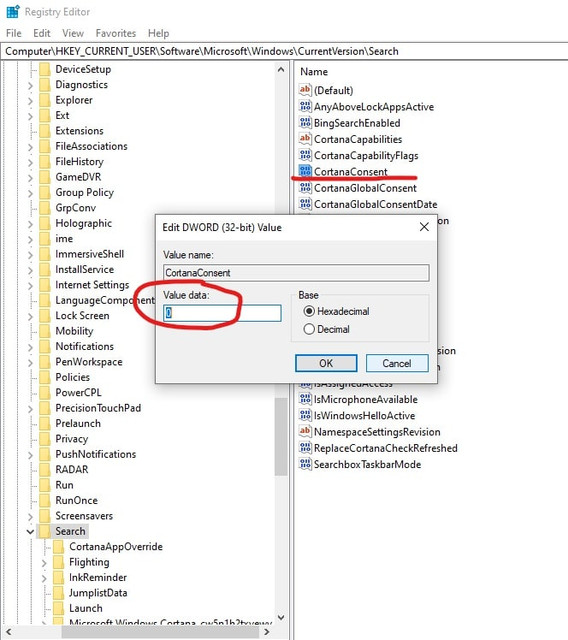
Below “BingSearchEnabled”, you should see “CortanaConsent”. Double click this value to open its properties dialog. Change its “Value Data” box “1” to “0”.
If you don’t see “CortanaConsent”, Right click on the Search and choose New > DWORD (32-bit) Value. Name the new value “CortanaConsent”.
Double click on “CortanaConsent” and make sure the number on the “Value data” box should be "0" — just ensure it’s still 0. Click OK to continue.

All done. Please double check and conform it. If you face any problem then please feel free to comment here I will fix it.
How to Disable Bing Search in the Windows 10 Start Menu with Registry Edit